Sampling the Brew
Using API Gateway To Bring An ASP.NET Core Application From AWS Lambda To The Real World
by JamesQMurphy | June 7, 2019
In the previous post I demonstrated how to manually deploy an ASP.NET Core application to AWS Lambda, and how to test the resulting Lambda function from the AWS console. But ASP.NET Core is a web platform; the whole point is to call it with a browser. To expose the Lambda function to the outside world of the Internet, we need another AWS offering: Amazon API Gateway. In this post, I'll explain how to do just that.
I'm actually bending the rules somewhat. API Gateway is designed as a just that; a platform to expose functionality through a Web API. You can declare your resources and choose which HTTP verbs (GET, POST, DELETE, etc.) are valid. You can tie each resource/verb combination to a specific AWS service, including not just Lambda, but others such as DynamoDB and S3. You can also configure specific portions of your API to forward the calls to virtual servers running in EC2. It's extremely flexible and you can do just about anything you want behind the API. In my case, I'm simply designing my API so that it responds to GET and POST requests with HTML -- which just so happens to be what web browsers expect from web servers.
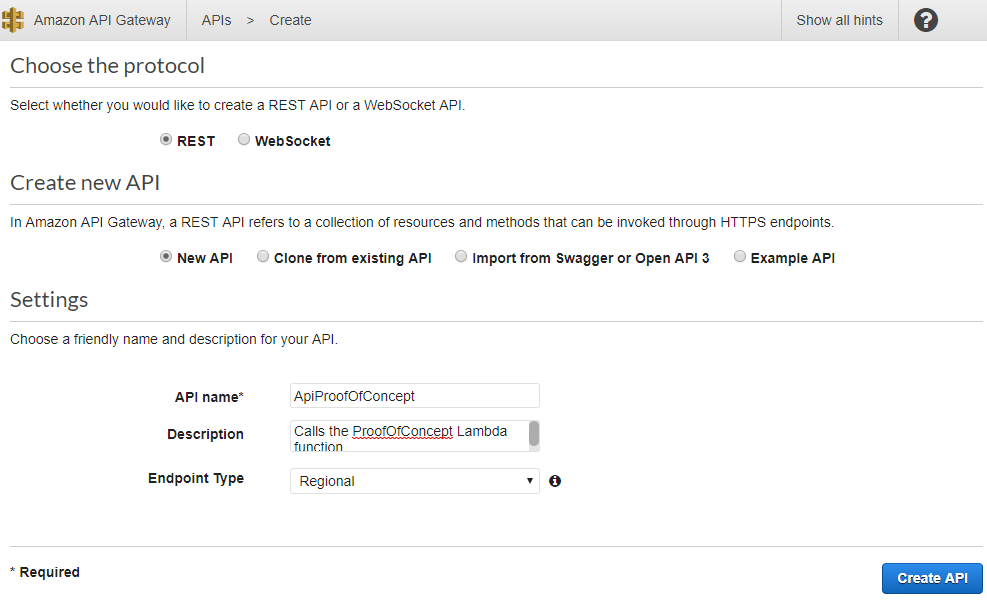
I'll start by clicking the "Create API" button and choosing the "REST API" option. Besides the usual options of name and description, there is an option for the endpoint type (Regional, Edge-Optimized, or Private). A discussion of the differences between Regional and Edge-Optimized endpoints is beyond the scope of this post; we'll just leave it at "Regional" and continue.
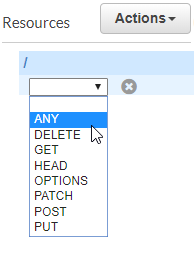
Once created, we are greeted with the API Design screen. The API has a single resource, the root. From the Actions menu, I select "Create Method":

We can choose any HTTP verb, and if you've got a simple content website, selecting "GET" might actually be the best choice. For this proof of concept, I'm choosing "ANY":
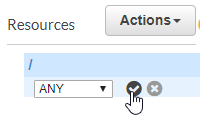
Click the checkbox to confirm the choice:
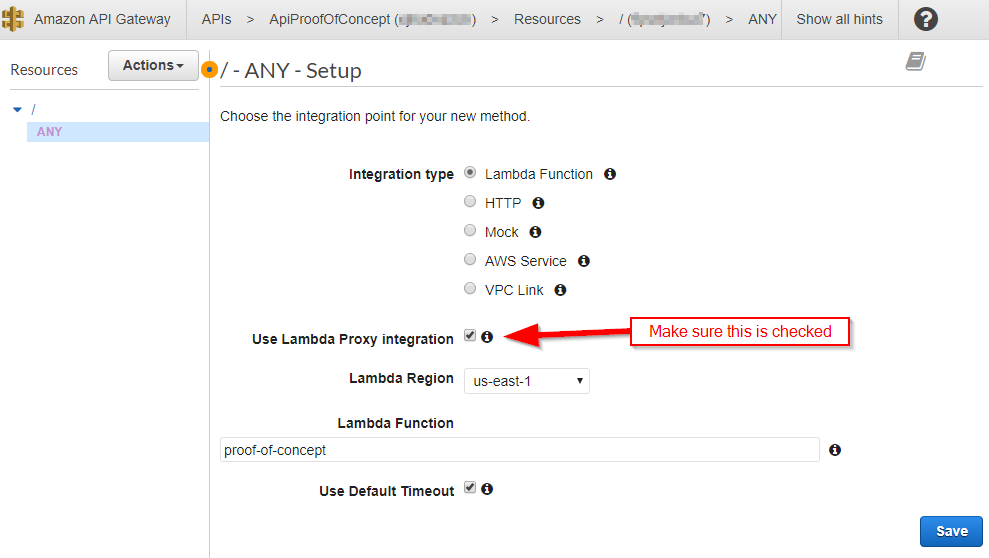
This brings us to the setup page for the root ANY method. This page shows the flexibility of API Gateway; I could map the ANY method to any of the choices listed. Note that even though "AWS Service" is listed as a choice, "Lambda Function" appears as its own special selection. This is the choice for now. Later on, I'll demonstrate how to call another AWS Service (specifically, S3), and we'll see how there are some additional steps necessary.
Aside from typing in the name of the Lambda function (and yes, there is autocomplete to help you), make sure to check the "Use Lambda Proxy integration" box. This is the magic that transforms the raw HTTP request into the JSON request that we saw when we tested the Lambda function in the previous post.
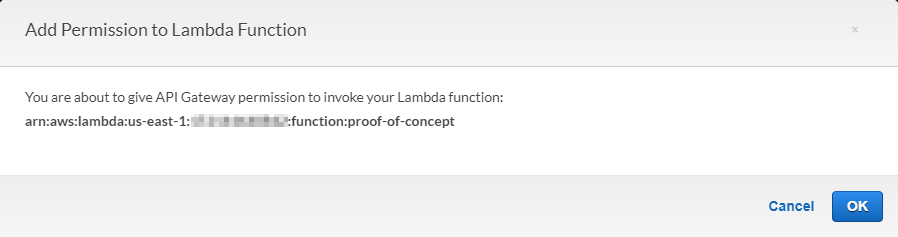
After clicking "Save", AWS will ask to grant a permission to your API. This is an important point that we will need to deal with later, but for now, it's as simple as clicking "OK".
AWS is actually creating a role for you. Roles are part of AWS Identity and Access Management (IAM), and I'll save a full discussion of IAM for another time. That said, I will briefly touch on creating roles later on.
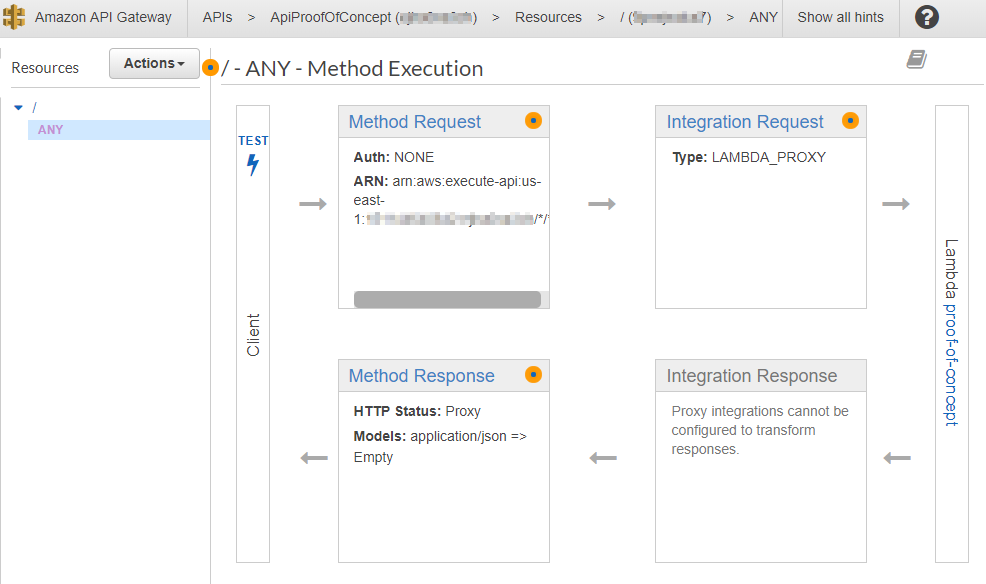
Now that the method is defined, AWS will present its configuration as a diagram. Following the arrows, you can see how the client invokes the "ANY" method, which gets passed to the LAMBDA_PROXY integration layer, and then on to the Lambda function itself. The results get bubbled back up as a response of the method:
You'll also notice a "TEST" button (complete with lightening bolt) in the client layer. Clicking it brings up the Method Test screen. Since this is the ANY method, we can literally choose any valid HTTP method from the dropdown. Let's select GET from the dropdown:
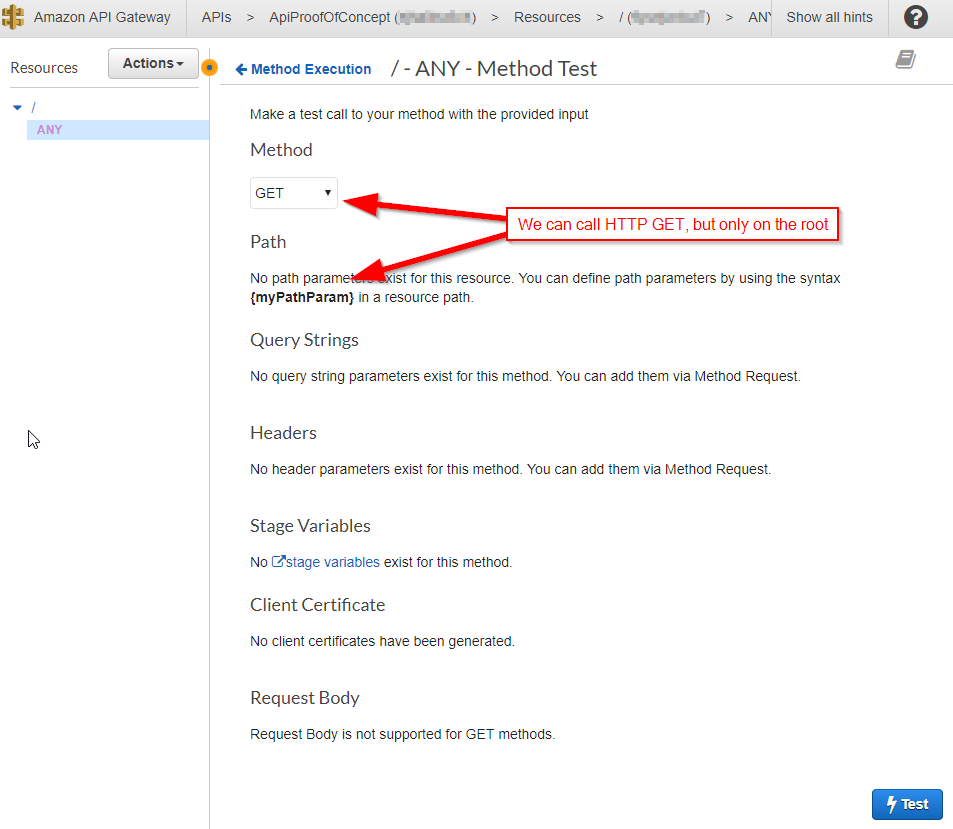
But also note that you cannot provide a path! This is because the ANY method we defined is on the root of the API. That's right; we can call any HTTP method, but only on the root of our API. We'll fix that in a moment, but for now, let's click the "Test" button (also complete with a lightening bolt) to confirm that it works:
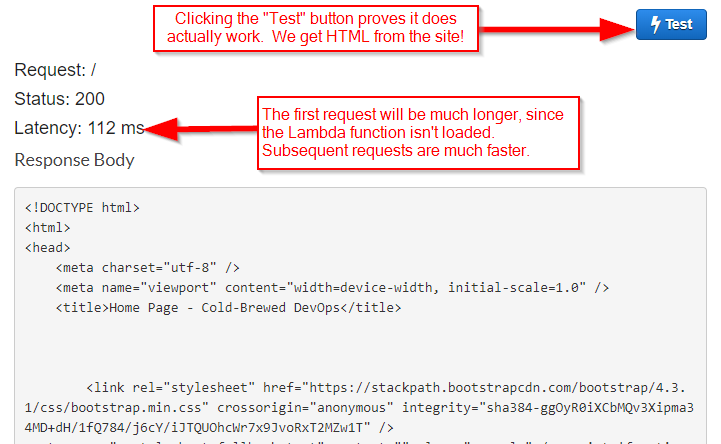
And it does -- the response of the API call is good ol' HTML. The first request will take several seconds longer (mine took around 7100ms), since AWS needs to spin up an instance of the Lambda function. If you click the "Test" button again, you'll observe that subsequent requests are much faster.
So now, let's turn our attention to the rest of the website. We need to define additional resources on the Web API that map to endpoints in the website. Thankfully, we don't need to individually define every single endpoint; API Gateway provides a substitution mechanism known as a proxy resource.
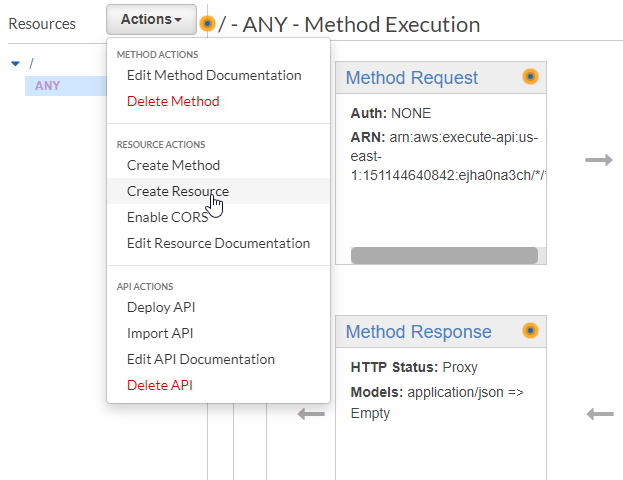
Let's create that resource by selecting "Create Resource" from the Actions dropdown:
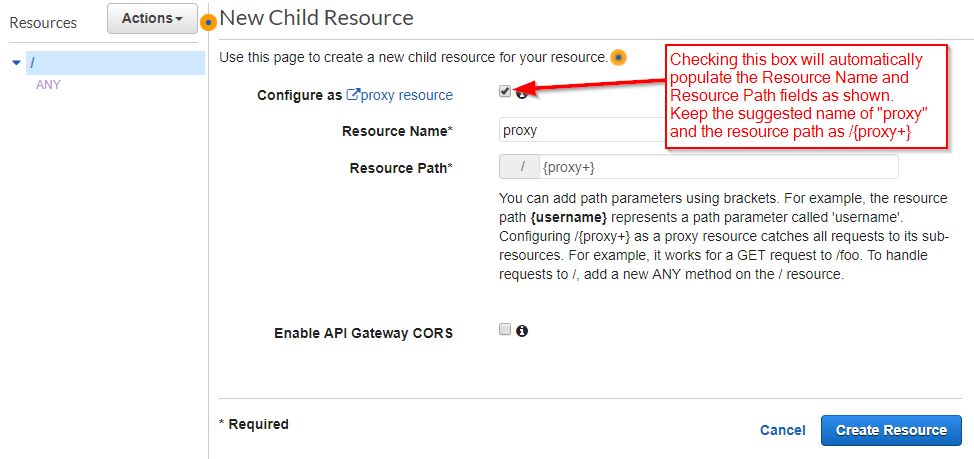
When you check the "Configure as proxy resource" box, AWS will automatically populate the Resource Name and Resource Path. Let's keep those names. We can also leave the "Enable API Gateway CORS" box unchecked since CORS won't be a concern for plain HTTP requests:
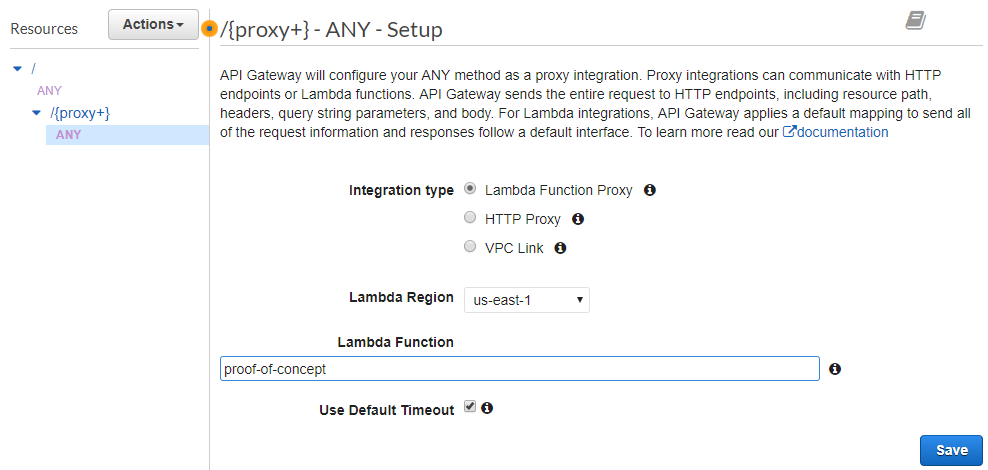
By default, AWS will create an ANY method for the new resource and leave you at the Method Setup screen. (You can define other methods afterwards.) But take a look at the choices; where are the options for "Mock" and "AWS Service"? Although it doesn't seem like a big deal at the moment, it will bite us later. But for now, we will select "Lambda Function Proxy" and type in the name of the Lambda function:
Once again, AWS will prompt about permissions (even if the role is already created):

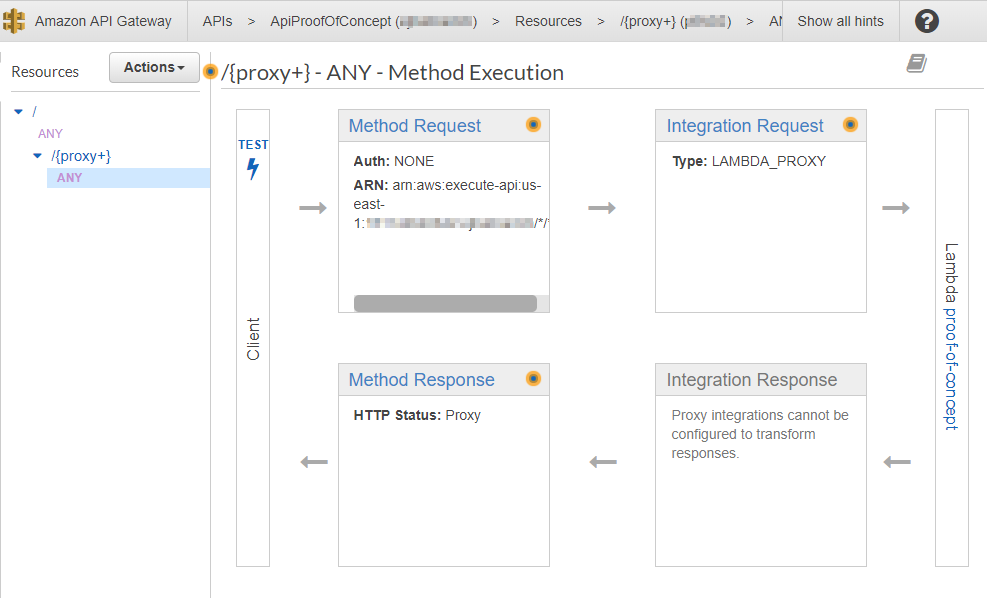
And once again, we are at the Method Execution screen. Of course, this is the new ANY method that we just created; you can always look at the left side of the screen, or the header bar at the top of the screen, to be sure:
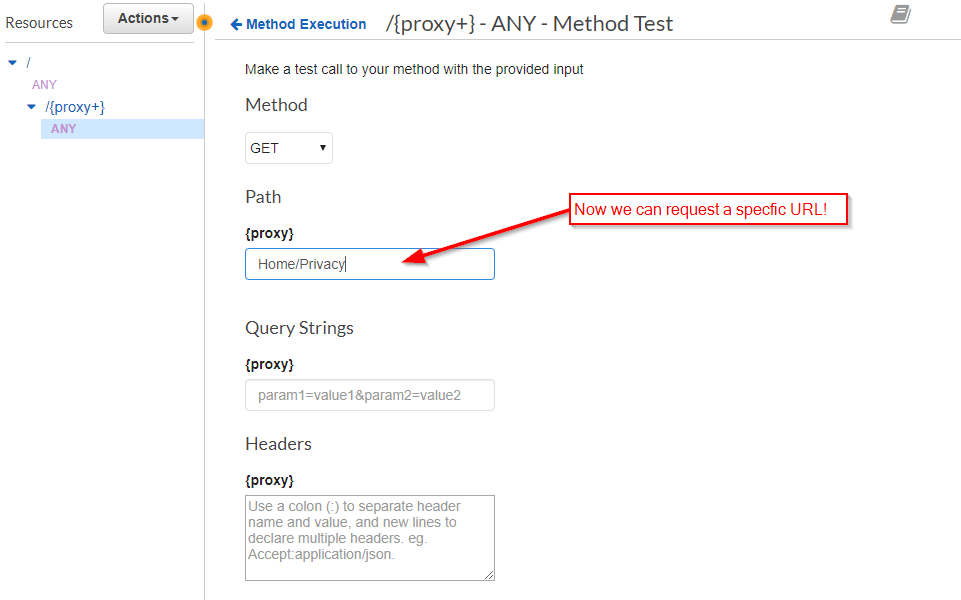
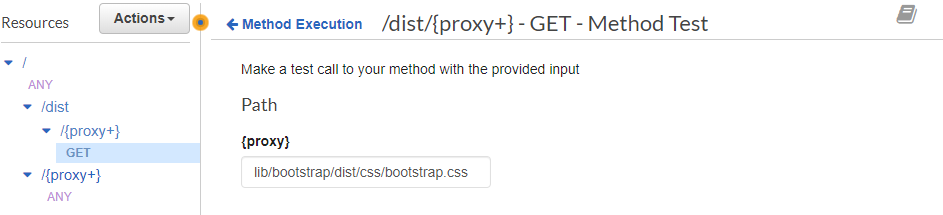
Click test to get to Method Test screen. Notice that this time,we can type a path in the {proxy} variable. (We can also specify a QueryString.). Let's try the path to the Privacy Policy (/Home/Privacy):
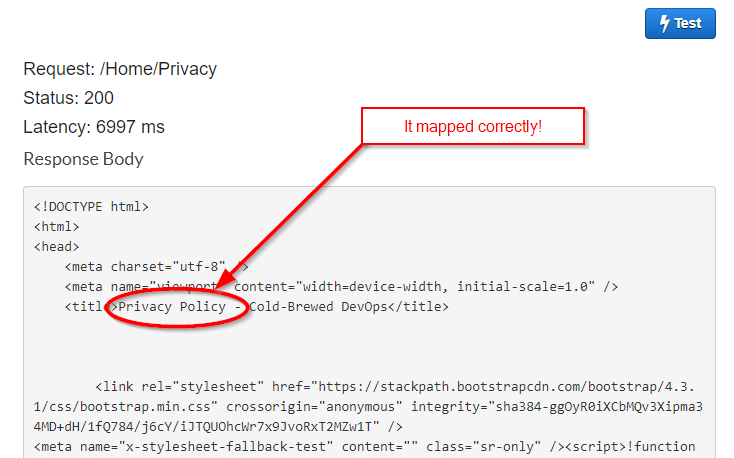
Sure enough, we are rewarded with the content of the Privacy Page:
This is a good point to point out the two biggest peculiarities (in my opinion) about AWS API Gateway:
- To host a website through API Gateway, you need to define methods on two resources: the root resource
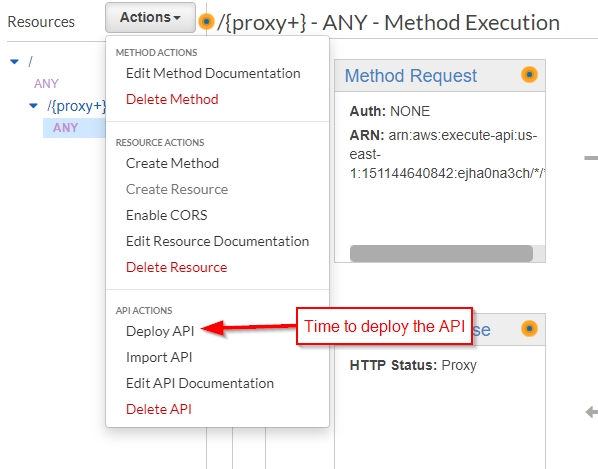
/, and everything else (/{proxy+}). - Every time you make a change, you need to re-deploy the API.
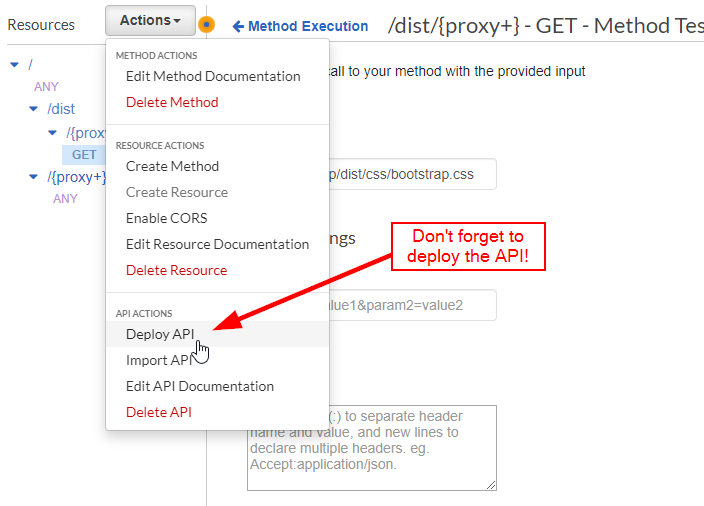
Wait, what was that about deploying the API? I wanted to emphasize this point right from the start. Nothing you do in the AWS Console for API Gateway will take effect until you deploy the API. I've forgotten it myself, and from what I've read on various support sites, so have others. So let's do it now:
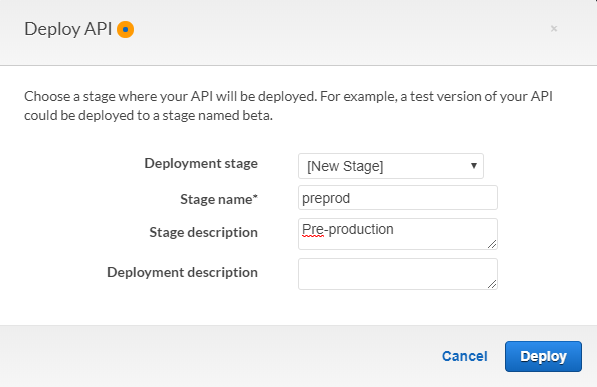
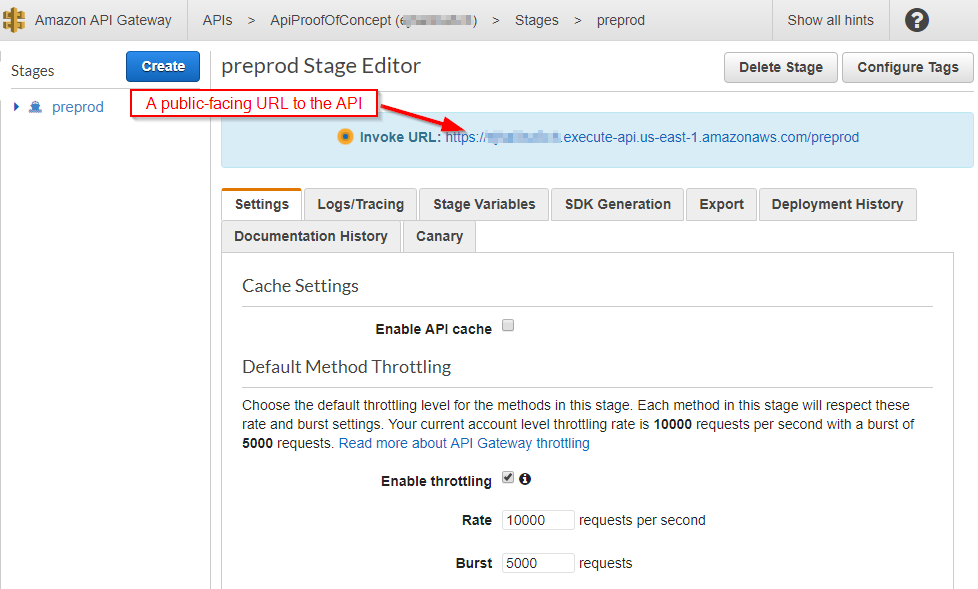
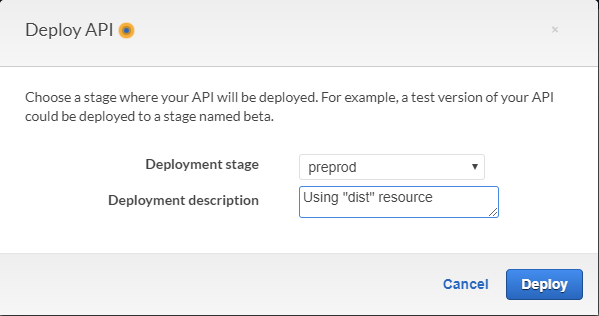
The first time you deploy, AWS will ask you to create a stage. I'll name it preprod:
Once you deploy it, you get a public URL to the API:
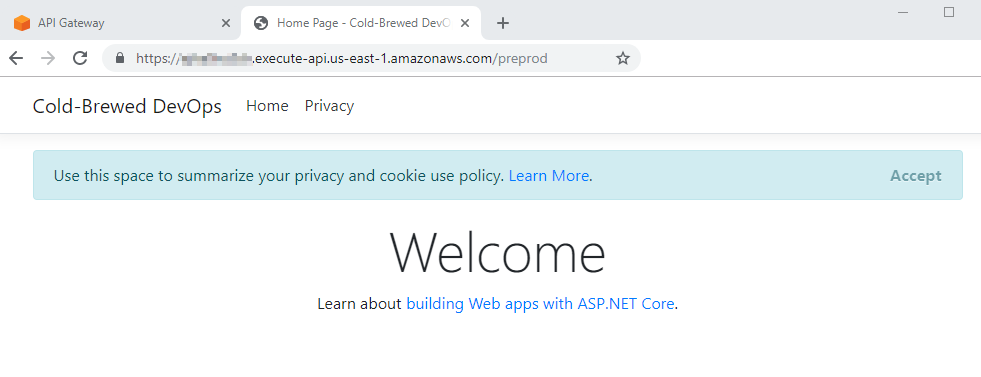
And if you click it, lo and behold, you see the site in a browser. Finally!
There's a couple of things to notice about the URL. Regional endpoints are publicly available, and they are SSL endpoints to boot. They include the API identifier in the URL, which isn't a concern, but it does make for an ugly URL under the amazonaws.com domain. Nevertheless, for testing purposes, it's very convenient. What might be a problem is the stage name (preprod in our case) is tacked on the end of the URL. For a plain ASP.NET MVC site, it works just fine, but if you're developing an Angular or React site, it will cause problems since those sites refer to the root of the site.
Of course, these issues are easily resolved by using a Custom Domain name for your API. Setting this up depends on your particular domain name provider. Naturally, AWS offers their own solution (Route 53), but you can use external DNS providers. I use Hover and I'll show how I set it up for this site in a future post.
Further Optimization
Even though we have a working website hosted in AWS with API Gateway, it's important to note that all HTTP requests -- every single one of them -- gets forwarded to the Lambda function. This includes static content such as images, style sheets, and JavaScript files. While this isn't necessarily a performance problem, it is incredibly wasteful to burn up to 90% of the free Lambda requests simply serving static content.
Fortunately, there is a low-cost alternative available: AWS S3. S3 is designed for storage, and it's cheap. In fact, you could simply host an entire content-only site in AWS S3 (and many sites do). For this site, I'm going to take advantage of the fact that most of the static content is located in a folder named dist, and I'll configure the API Gateway to send those requests to S3 instead of the Lambda function.
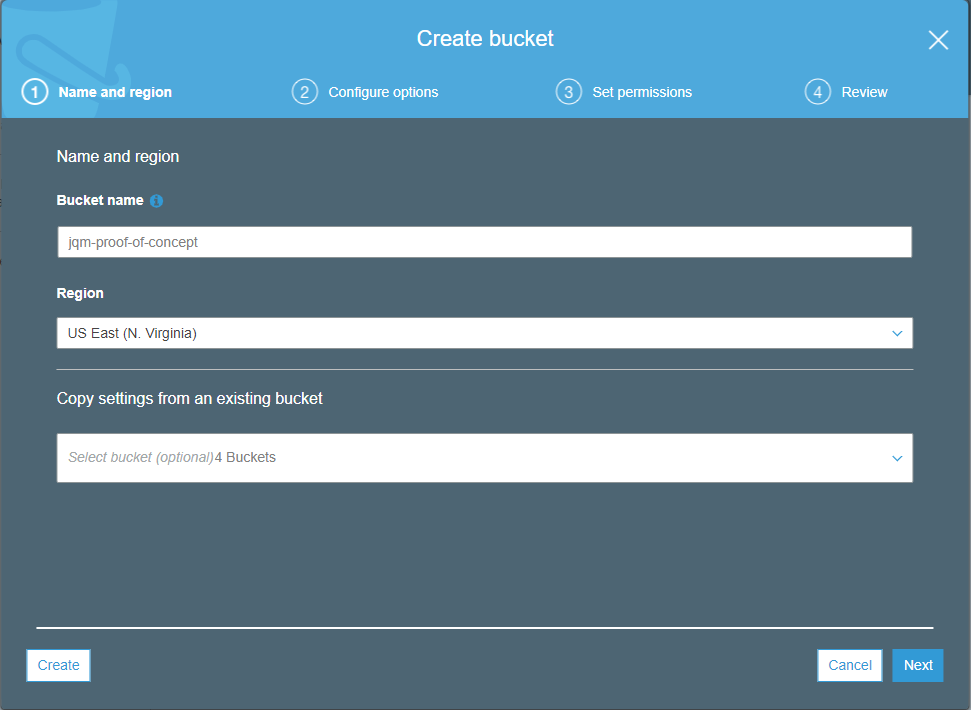
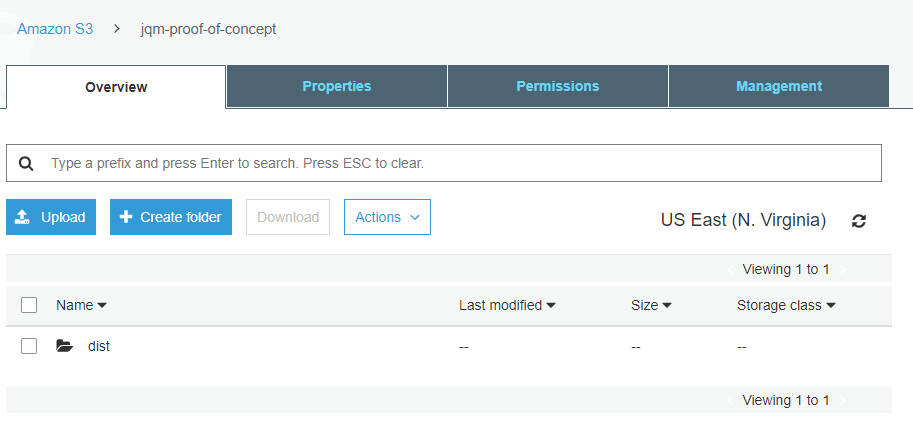
Creating an S3 Storage bucket is easy, but there's a slight catch with the naming -- the name has to be globally unique. This is because S3 buckets can potentially be exposed via a public URL, so when you pick a name, it has to be unique enough for the World Wide Web. In fact, that's an easy way to address the problem; simply make the S3 bucket public (it's static content, after all) and use API Gateway to map the URL to the S3 URL. However, I didn't want do it that way. My S3 bucket will stay private. For this demo, I chose jqm-proof-of-concept as the name:
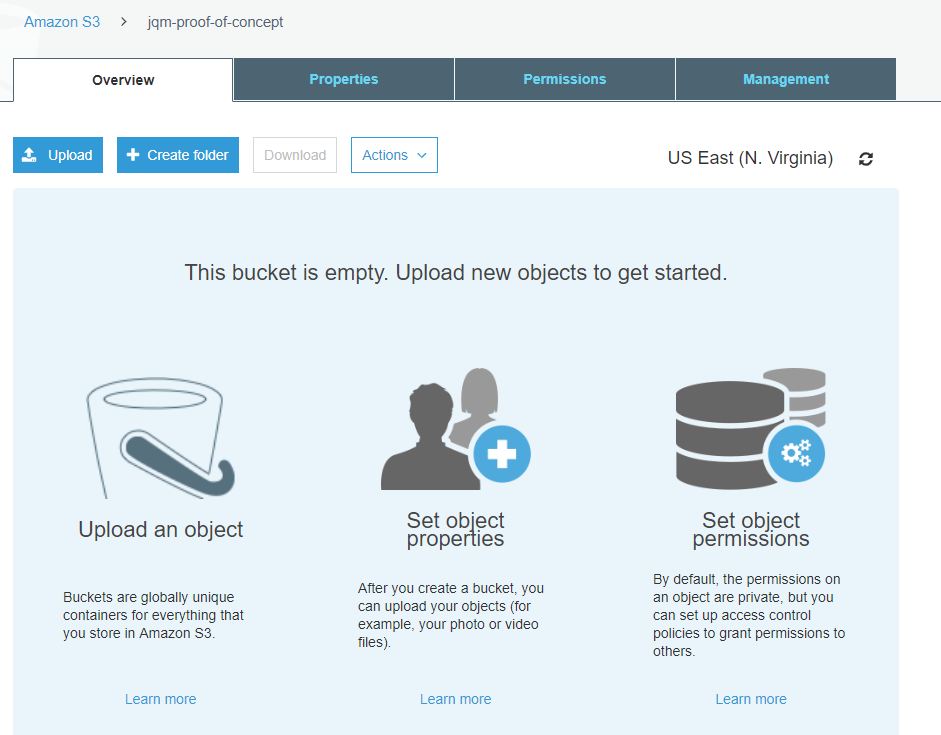
I won't walk through all of the creation options, since the default options leave you with a private bucket. This is what the screen will look like after you create your S3 bucket... it's empty, and yet full of options... and possibilities.
Uploading the dist folder is as simple as dragging and dropping:
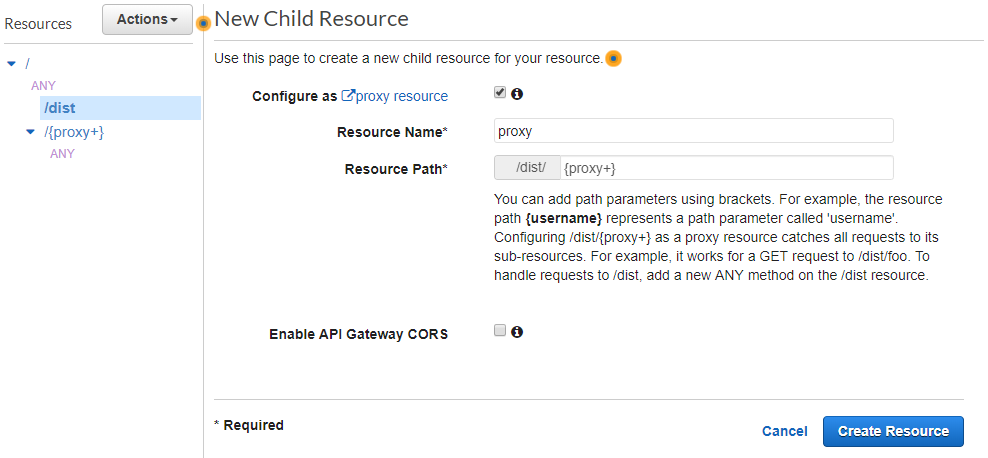
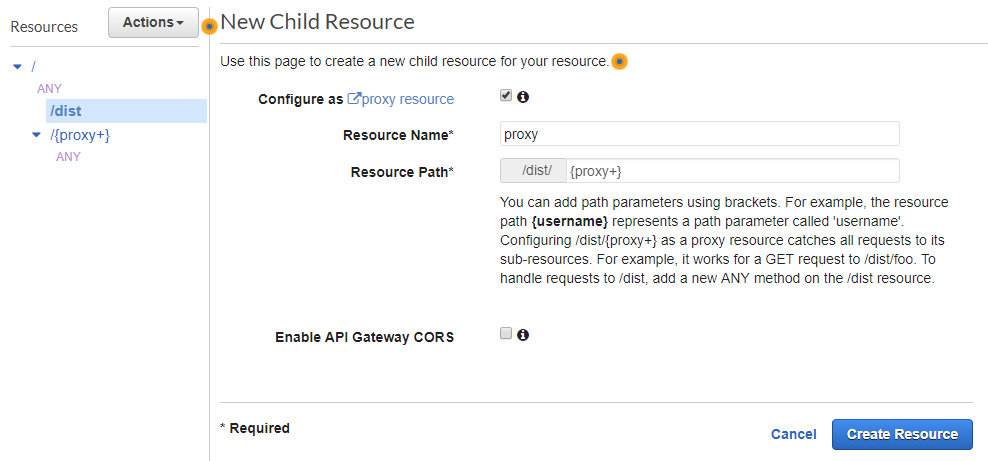
Now, let's return to the API Gateway and create the resource for the dist folder. We actually need to create two new resources; one for the /dist path itself, and one for any path underneath. First, we create the /dist resource itself:
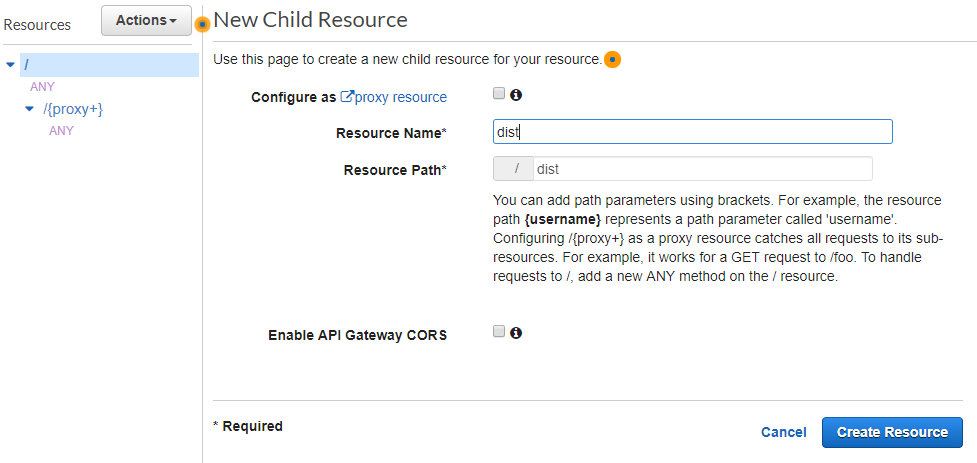
And now underneath the dist resource, we create a new proxy resource:
And this is where things take a hard left turn.
Manual Labor
When I was first going through this setup, I ran into two roadblocks. These roadblocks are not hard to overcome, but they are certainly annoying. Considering that they need to be done for each website you stand up, it does solidify the case for automating the entire process (which I will do in a later post):
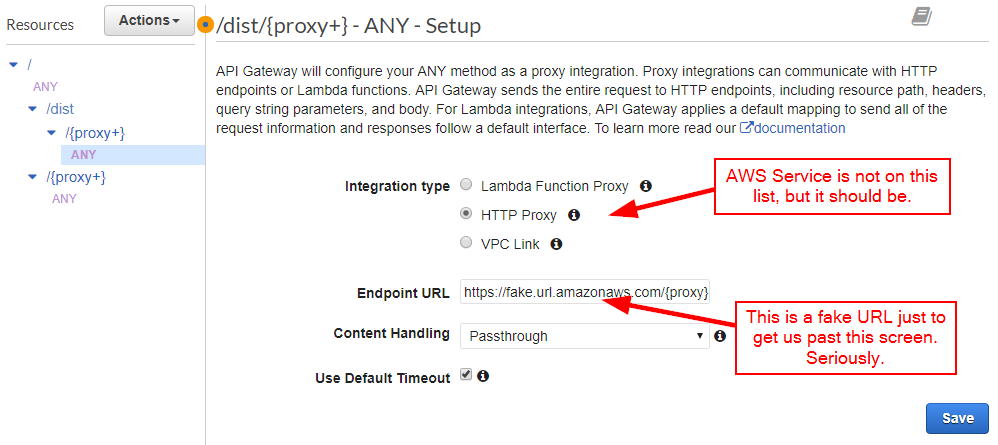
- Remember when setting up a proxy resource, there was no option for AWS Service? This time, it was a problem, since I was calling an AWS Service (S3) this time. As it turns out, this is simply a glitch with the interface of the AWS Console, and we'll work around it.
- Remember when setting up resources to Lambda functions, AWS was kind enough to ask us about permissions and even create the role for us? Well this time, we are on our own and we need to create the role ourselves. (And that's not straightforward either!)
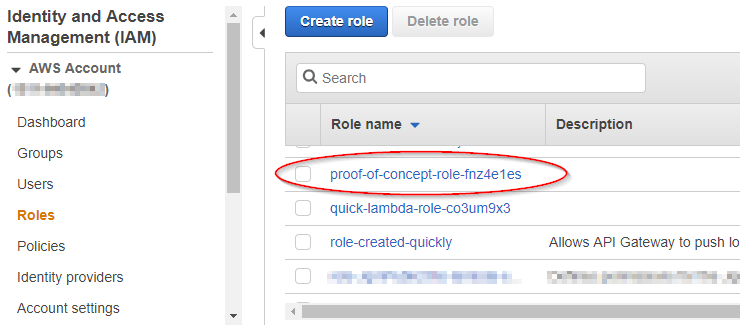
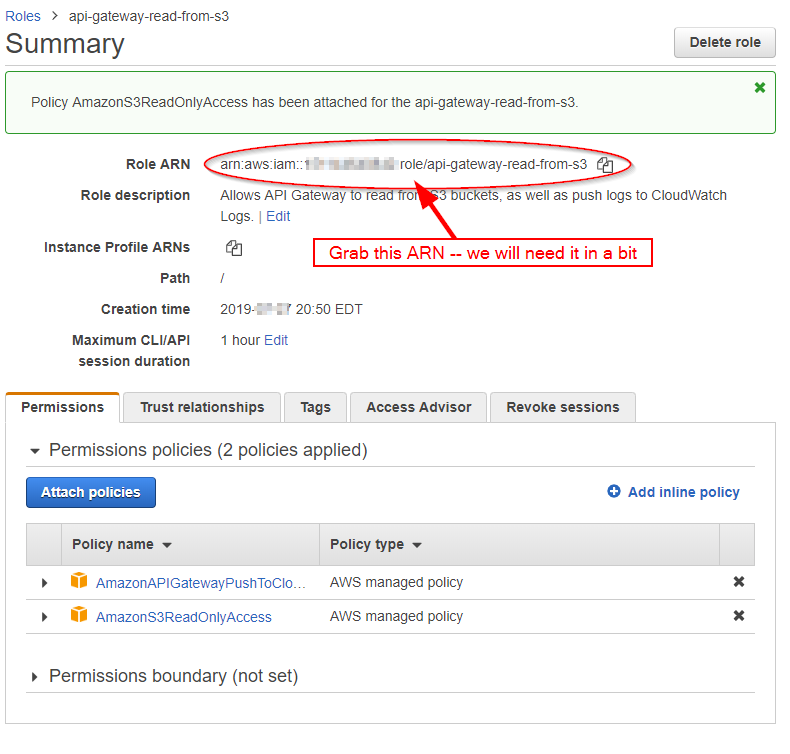
Let's start by creating the role on the IAM Roles screen. I won't go into any details because this is not a post about IAM, but the gist is that we need to create a role that will allow our API Gateway to read objects from S3. I will also point out that you can see the role that AWS created earlier:
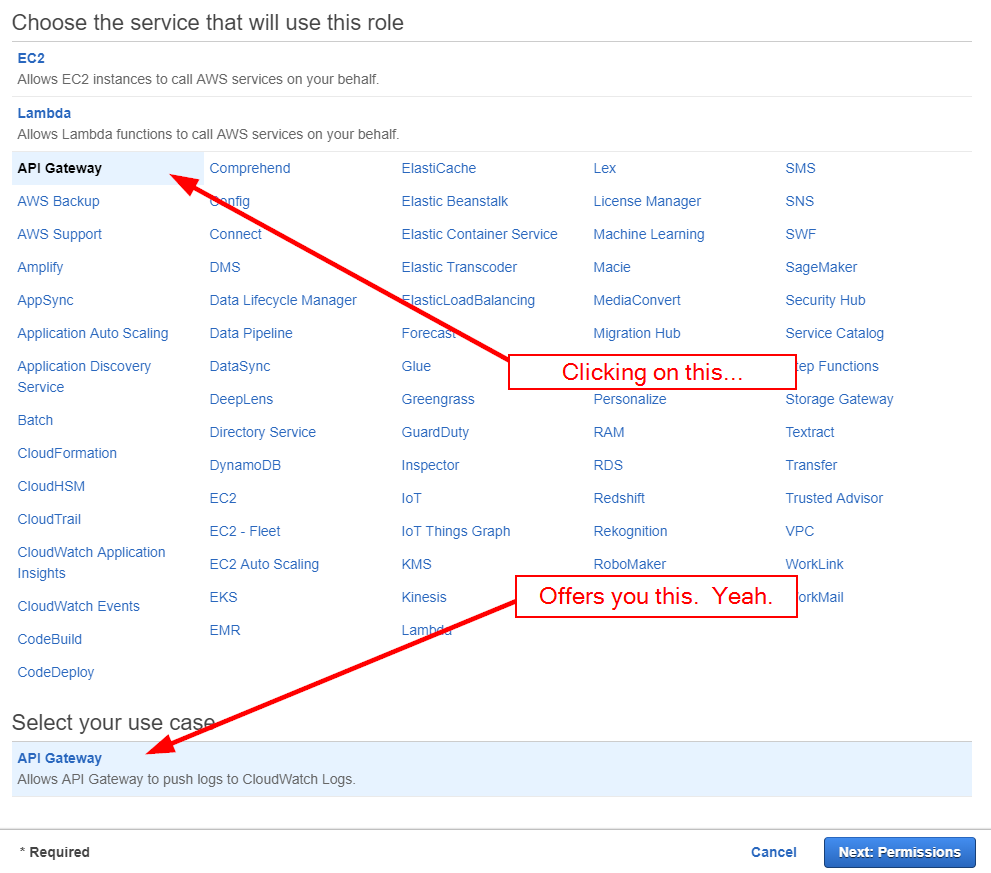
When you click the "Create Role" button, you are presented with a wizard-like screen that seems like it will be helpful. It isn't. Clicking on "API Gateway" presents a single use case: the ability to write to CloudWatch logs.
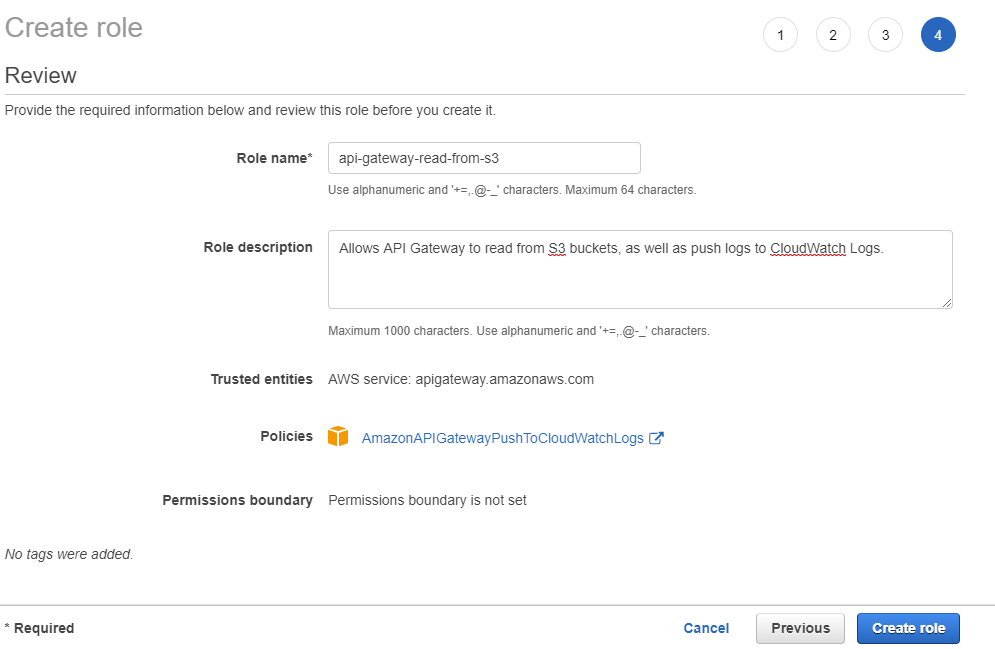
There isn't much you can do on the following screens, so simply click "Next" on the "Attached permissions policies" and "Add tags" screens. On the final screen, we'll give a name and description to the role, but they will describe what the role will be after we change it:
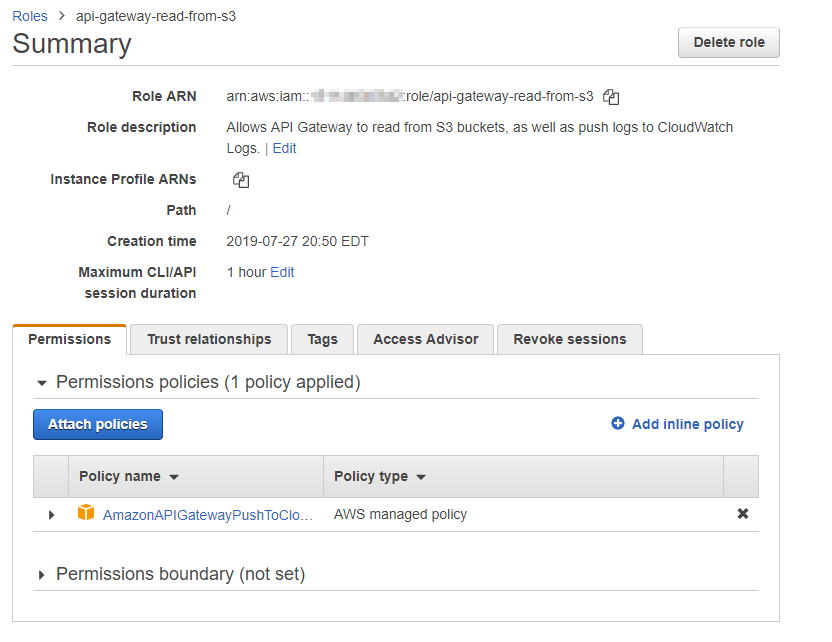
After creating the role, we can click into the role to bring up the role summary screen:
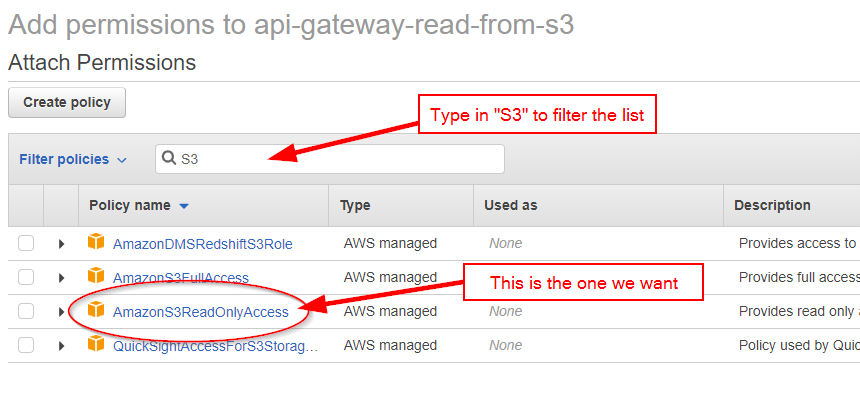
Click on the "Attach policies" button, then narrow the resulting list by typing "S3" into the filter box. Look for AmazonS3ReadOnlyAccess; that is the permission that we want.
Check the box and click "Attach Policy". The role now has both policies attached. We will need the Role ARN later on, so grab it and stash it for later:
Heading back to API Gateway, let's finally create that proxy resource under the /dist resource:
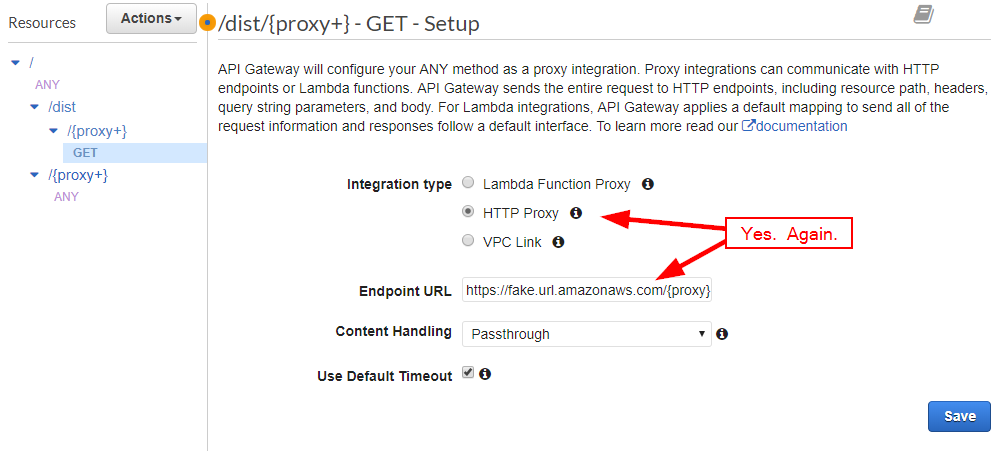
On the next screen, we would like to select "AWS Service," but it is strangely absent from this screen. Choose "HTTP Proxy" for now and put in a fake URL just to get past the screen validation. I'm not kidding.
Now the fun begins. Delete the ANY method:
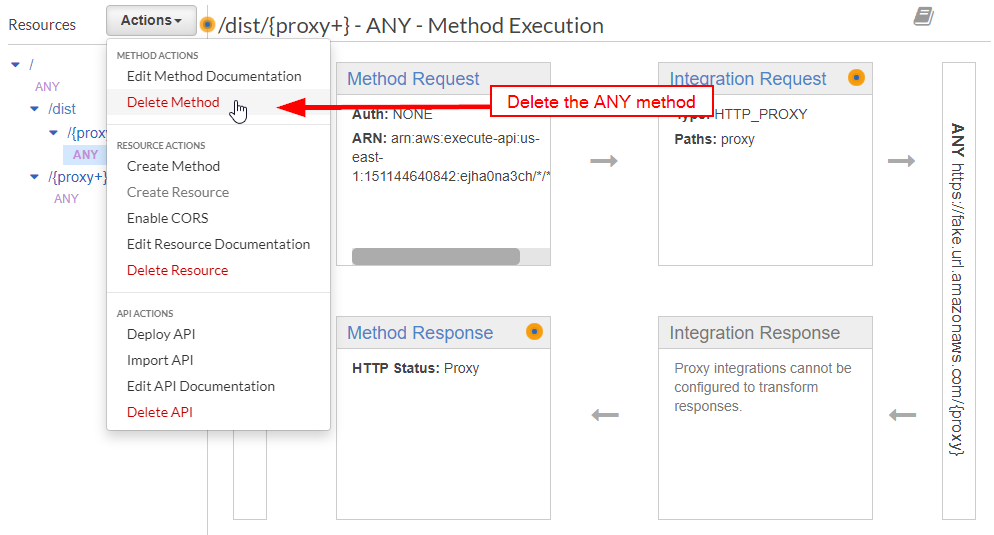
Create a GET method. You'll need to do the same fake URL again:
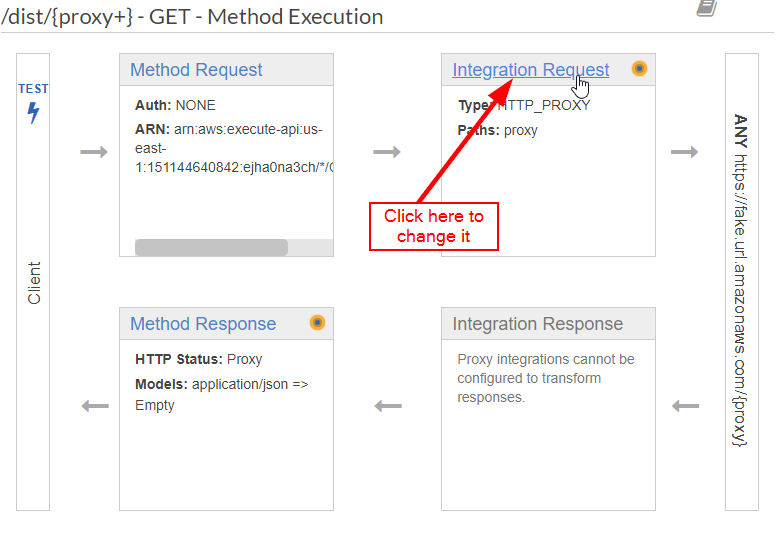
This time, click on "Integration Request":
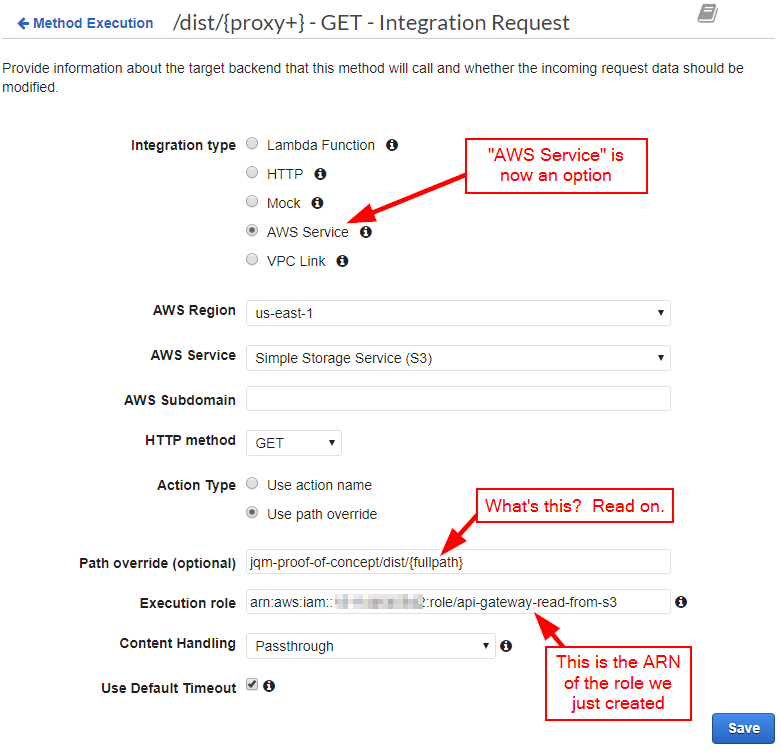
Lo and behold, all the choices are there! Select "AWS Service" and fill out the form appropriately. Note that "Path override" is the path into the Amazon S3 Bucket, followed by a placeholder variable that I've named {fullpath} (I'll explain in a moment). Also, there is a field to hold the ARN of the role we just created:
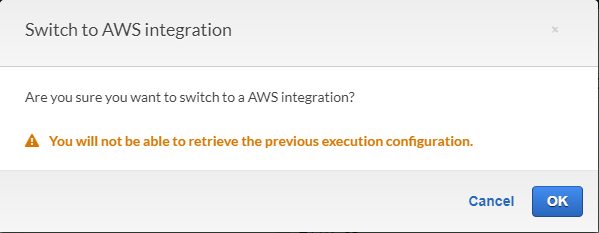
After clicking "Save," you'll receive a somewhat ominous warning:
After saving, expand the "URL Path Parameters" section:
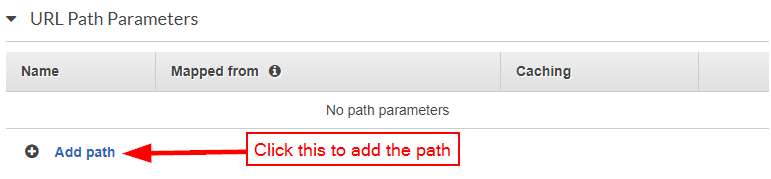
This is actually where {fullpath} is defined. Here, I am setting it to the value of {proxy+}:

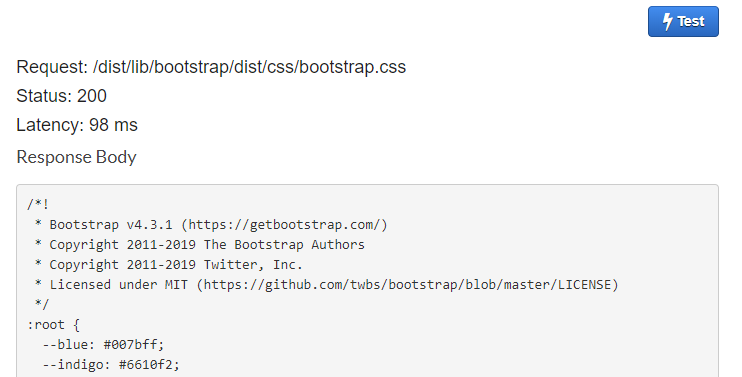
Heading back out to the Method Test screen, we can check to see if it works:
And it certainly does. It's much faster than Lambda as well:
Remember, before testing it in a browser, we need to deploy the API. (Did you forget?)
You can deploy it to a new stage, or deploy it to an existing stage. Feel free to enter a comment as well:
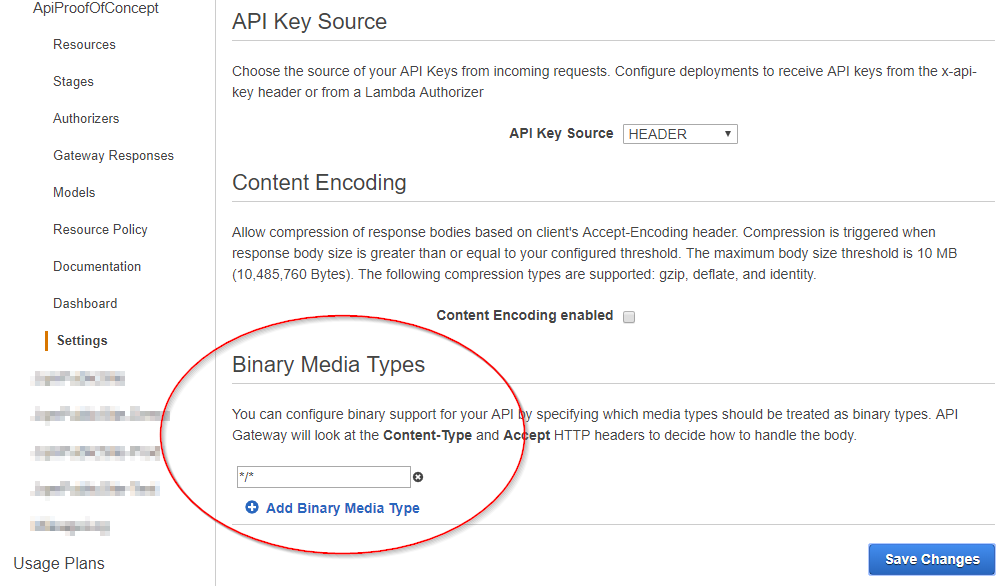
And that's essentially it! However, I will point out two additional difficulties that you may run into when it comes to images:
- You'll need to enable "Binary Media Types" in the API settings (and according to this StackOverflow answer, it needs to be
*/*):
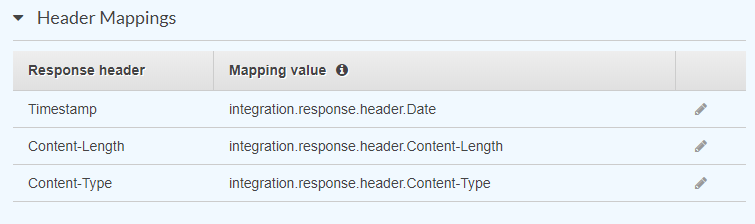
- You'll need to add the
Timestamp,Content-Length, andContent-Typeresponse headers to the "Method Response" section, and then map those values to theintegration.response.header.Date,integration.response.header.Content-Length, andintegration.response.header.Content-Typevalues in the "Integration Response" section. This is something that I'll be doing when I automate the process, so I'll just show the "Header Mappings" section:
- And of course, you'll need to deploy the API after you make thse changes.
As you can see, deploying a site to AWS manually can be a tedious process, and this is just a proof of concept! Over the next few posts, I'll turn these manual steps into a streamlined, automatic CI/CD process.